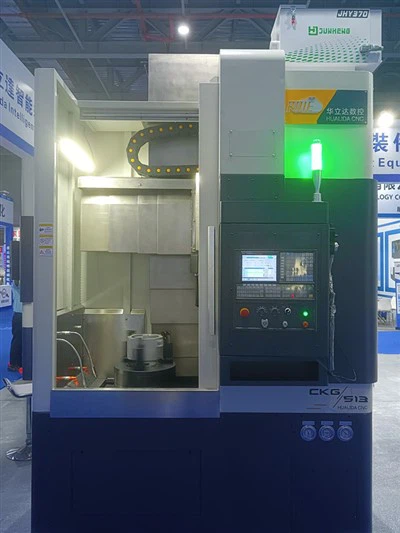
Installing a CNC lathe is a complex yet rewarding process that requires careful planning, precision, and a good understanding of the machine's components. As a supplier of CNC Lathe and Milling Machine, I've witnessed firsthand the importance of a proper installation to ensure the optimal performance of these sophisticated machines. In this blog post, I'll guide you through the step-by-step process of installing a CNC lathe, sharing insights and tips along the way.
Step 1: Preparation
Before you even unpack the CNC lathe, thorough preparation is essential. This phase sets the foundation for a smooth installation process.
Site Selection
Choose a suitable location for the lathe. The area should be level, stable, and free from excessive vibrations. A concrete floor is ideal as it provides a solid base. Ensure there is enough space around the machine for easy access, maintenance, and operator movement. Consider factors such as ventilation, lighting, and proximity to power sources and coolant supply.
Power Requirements
Check the power specifications of the CNC lathe. Most CNC lathes require a three-phase power supply. Consult an electrician to ensure that the electrical system in your facility can handle the machine's power demands. Install appropriate circuit breakers and grounding to prevent electrical hazards.
Tool and Equipment Gathering
Collect all the necessary tools and equipment for the installation. This may include wrenches, screwdrivers, hoists, and measuring devices. Having everything readily available will save time and prevent delays during the installation process.
Step 2: Unpacking and Inspection
Once the preparation is complete, it's time to unpack the CNC lathe and conduct a thorough inspection.
Unpacking
Carefully unpack the lathe, following the manufacturer's instructions. Keep track of all the components, accessories, and documentation. Inspect the parts for any visible damage during transit. If you notice any issues, contact the supplier immediately.
Component Identification
Familiarize yourself with the various components of the CNC lathe. This includes the bed, headstock, tailstock, carriage, and control panel. Understanding the function and location of each component will make the installation process easier.
Step 3: Installation of the Base
The base of the CNC lathe provides stability and support for the entire machine. Proper installation of the base is crucial for accurate machining.
Positioning the Base
Use a hoist or crane to lift the base of the lathe into position. Ensure that the base is level using a spirit level. Adjust the leveling feet to achieve a perfectly horizontal surface. This step is critical as an uneven base can lead to inaccurate machining and premature wear of the machine components.
Anchoring the Base
Once the base is level, anchor it to the floor using bolts or other appropriate fastening methods. This will prevent the lathe from moving during operation, ensuring consistent and precise machining.
Step 4: Assembly of the Components
With the base in place, it's time to assemble the remaining components of the CNC lathe.
Headstock Installation
The headstock is the heart of the lathe, housing the spindle and the drive system. Carefully lift the headstock and mount it onto the base. Align the headstock with the base using alignment pins or other alignment methods provided by the manufacturer. Secure the headstock in place using bolts.
Tailstock Installation
The tailstock provides support for the workpiece during machining. Install the tailstock on the bed, opposite the headstock. Ensure that the tailstock can move smoothly along the bed and that it aligns with the headstock spindle.
Carriage Installation
The carriage holds the cutting tool and moves along the bed to perform machining operations. Install the carriage on the bed, making sure it can move freely and smoothly. Connect the carriage to the drive system, such as the lead screw or ball screw.
Control Panel Installation
The control panel is the interface between the operator and the CNC lathe. Mount the control panel in a convenient location, within easy reach of the operator. Connect the control panel to the machine's electrical system and ensure that all the connections are secure.
Step 5: Electrical and Hydraulic Connections
After the mechanical components are assembled, it's time to make the electrical and hydraulic connections.
Electrical Wiring
Follow the electrical wiring diagram provided by the manufacturer to connect the various electrical components of the CNC lathe. This includes the control panel, motors, sensors, and lighting. Ensure that all the wiring is properly insulated and secured to prevent short circuits and electrical failures.
Hydraulic Connections
If the CNC lathe is equipped with a hydraulic system, connect the hydraulic hoses and fittings. Check for any leaks and ensure that the hydraulic fluid level is correct. The hydraulic system is responsible for powering various functions of the lathe, such as the clamping of the workpiece and the movement of the carriage.
Step 6: Testing and Calibration
Once all the connections are made, it's time to test the CNC lathe and perform calibration.


Initial Power-On
Turn on the power to the CNC lathe and check for any error messages on the control panel. If there are any issues, refer to the troubleshooting guide provided by the manufacturer.
Function Testing
Test each function of the CNC lathe, including the spindle rotation, carriage movement, and tool change. Check for smooth operation and proper alignment. Make any necessary adjustments to ensure that the machine is functioning correctly.
Calibration
Calibrate the CNC lathe to ensure accurate machining. This includes calibrating the spindle speed, feed rate, and tool offsets. Use precision measuring devices to verify the accuracy of the machine's movements.
Step 7: Training and Documentation
After the installation and testing are complete, it's important to provide training to the operators and keep proper documentation.
Operator Training
Provide comprehensive training to the operators on how to use the CNC lathe safely and effectively. This includes training on the control panel, programming, and maintenance procedures. Ensure that the operators are familiar with the machine's safety features and emergency stop procedures.
Documentation
Keep all the installation documentation, including the user manual, wiring diagrams, and calibration records. This documentation will be useful for future maintenance and troubleshooting.
Conclusion
Installing a CNC lathe is a complex process that requires careful planning, precision, and attention to detail. By following the steps outlined in this blog post, you can ensure a successful installation of your CNC lathe. As a supplier of CNC Lathe and Milling Machine, we are committed to providing high-quality machines and excellent customer support. If you have any questions or need assistance with the installation process, please don't hesitate to contact us. We look forward to helping you with your CNC Turning and Milling Machine Tools needs and ensuring that you get the most out of your CNC Turning and Milling operations. Whether you are a small workshop or a large manufacturing facility, we can provide the right solutions for your business. Contact us today to start a discussion about your specific requirements and let us help you take your machining capabilities to the next level.
References
- Manufacturer's User Manual for CNC Lathe
- Industry Standards for CNC Machine Installation
- Electrical and Hydraulic System Guidelines