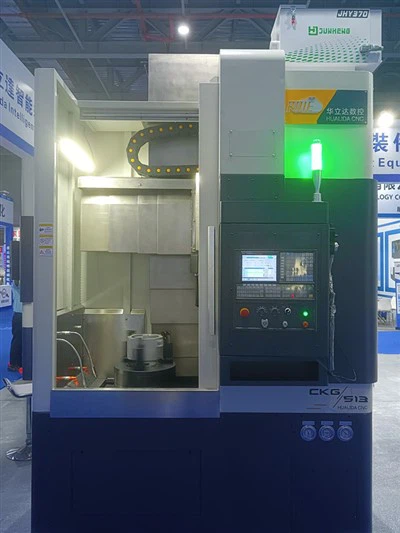
Hey there! I'm a supplier of the CKG5110 CNC Vertical Lathe, and today I'm gonna share with you how to adjust the clamping force of the chuck on this awesome machine.
First off, let's understand why adjusting the clamping force is so important. The right clamping force ensures that the workpiece is held securely during machining. If the clamping force is too low, the workpiece might move or vibrate, leading to poor machining accuracy and even damage to the part or the machine. On the other hand, if the clamping force is too high, it could cause deformation of the workpiece, especially for thin - walled or delicate parts.
1. Know Your Chuck
The CKG5110 CNC Vertical Lathe usually comes with a hydraulic or pneumatic chuck. Each type has its own way of adjusting the clamping force.
Hydraulic Chucks
If your lathe has a hydraulic chuck, the clamping force is controlled by the hydraulic pressure. You'll need to locate the hydraulic control unit. This unit usually has a pressure gauge and a pressure - adjusting valve.
To start, make sure the machine is turned off and the hydraulic system is depressurized. Then, use a pressure - adjusting tool (usually a wrench) to turn the pressure - adjusting valve. Turning the valve clockwise will increase the pressure, which in turn increases the clamping force. Turning it counter - clockwise will decrease the pressure and the clamping force.
After making the adjustment, turn on the machine and check the pressure gauge to see if the pressure is at the desired level. It's a good idea to do a test run with a sample workpiece to make sure the clamping is just right.
Pneumatic Chucks
For pneumatic chucks, the process is a bit different. The clamping force is controlled by the air pressure. Find the pneumatic control valve, which is often located near the chuck or on the machine's control panel.
Similar to the hydraulic chuck, use a suitable tool to adjust the air pressure. Increasing the air pressure will increase the clamping force, and decreasing it will reduce the clamping force. Again, check the pressure with a pressure gauge and do a test run.
2. Consider the Workpiece Material
The material of the workpiece also plays a big role in determining the appropriate clamping force.
Soft Materials
If you're working with soft materials like aluminum or plastics, you don't need a very high clamping force. High clamping force could cause the material to deform. For example, when machining an aluminum part, start with a relatively low clamping force and gradually increase it if needed. You can start with a pressure of around 2 - 3 MPa for hydraulic chucks or 2 - 3 bar for pneumatic chucks.


Hard Materials
Hard materials like steel or cast iron can withstand higher clamping forces. You might need to increase the pressure to ensure the workpiece is held firmly during machining. For steel parts, you could start with a pressure of around 4 - 5 MPa for hydraulic chucks or 4 - 5 bar for pneumatic chucks.
3. Check the Chuck Condition
The condition of the chuck itself can affect the clamping force. Over time, the chuck jaws can wear out, which can lead to uneven clamping and reduced clamping force.
Regularly inspect the chuck jaws for signs of wear, such as grooves or uneven surfaces. If the jaws are worn, you may need to replace them. Also, make sure the chuck is clean and free of debris. Dirt or chips between the jaws and the workpiece can reduce the clamping force and cause the workpiece to slip.
4. Use Measuring Tools
To get the most accurate clamping force, you can use specialized measuring tools.
Force Sensors
There are force sensors available that can be placed between the chuck and the workpiece. These sensors can measure the actual clamping force and give you a precise reading. This is especially useful when you need to achieve a very specific clamping force for a particular machining operation.
Torque Wrenches
If your chuck uses bolts or screws to adjust the clamping force, a torque wrench can be very helpful. You can set the torque value according to the manufacturer's recommendations to ensure the correct clamping force.
5. Do a Test Run
After making all the adjustments, it's crucial to do a test run.
Mount a sample workpiece similar to the one you'll be machining. Start the machine at a low speed and observe the workpiece. Check for any signs of movement or vibration. If the workpiece is slipping or vibrating, you may need to increase the clamping force. If the workpiece shows signs of deformation, you'll need to decrease the clamping force.
Related Products
If you're interested in other vertical lathes, we also offer some great options. Check out our New Vertical Lathe for the latest technology and features. The CKG513 CNC Vertical Lathe is another excellent choice for more heavy - duty machining. And don't forget our New CNC Vertical Lathe, which combines precision and efficiency.
In conclusion, adjusting the clamping force of the chuck on the CKG5110 CNC Vertical Lathe requires a combination of understanding the chuck type, considering the workpiece material, checking the chuck condition, using measuring tools, and doing a test run. By following these steps, you can ensure that your machining operations are accurate, efficient, and safe.
If you're in the market for a CKG5110 CNC Vertical Lathe or have any questions about adjusting the clamping force, feel free to reach out to us for a purchase negotiation. We're here to help you get the most out of your machining operations.
References
- Manufacturer's manual for CKG5110 CNC Vertical Lathe
- Handbook of CNC Machining Technology