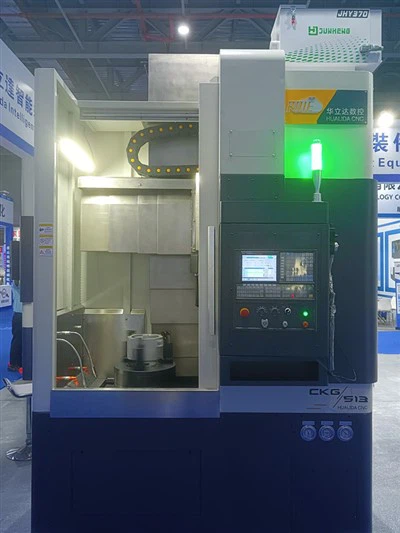
Hey there! As a supplier of Hard Rail Vertical Lathes, I know how crucial it is to keep these machines in top - notch condition. One important part that often gets overlooked is the coolant tank. A clean coolant tank not only extends the life of your Hard Rail Vertical Lathe but also ensures better machining performance. So, let's dive into how to clean the coolant tank of a Hard Rail Vertical Lathe.
Why Clean the Coolant Tank?
Before we get into the cleaning process, it's good to know why we're doing it. The coolant in your lathe plays a vital role. It cools down the cutting tool and the workpiece during the machining process, reduces friction, and helps to flush away chips. Over time, though, the coolant can become contaminated. You'll find metal chips, dirt, and bacteria building up in the tank. This can lead to a bunch of problems. The contaminated coolant might not cool as effectively, which can cause the cutting tool to wear out faster. It can also lead to corrosion in the tank and other parts of the lathe. So, regular cleaning is a must - do.
Pre - cleaning Preparations
First things first, safety is key. You'll need to wear appropriate personal protective equipment (PPE). This includes gloves to protect your hands from the coolant, which can sometimes be harsh on the skin, and safety glasses to shield your eyes from any splashes.
Next, gather your cleaning tools. You'll need a siphon or a pump to remove the old coolant from the tank. A good - quality scrub brush and some cleaning agents designed for coolant tanks are also essential. Make sure the cleaning agents are compatible with the materials of your coolant tank. You don't want to cause any damage.
Before you start draining the coolant, make sure the lathe is turned off and unplugged. This is a basic but super important step to avoid any electrical accidents.
Draining the Coolant
Once you've got your PPE on and your tools ready, it's time to drain the coolant. Locate the drain valve at the bottom of the coolant tank. Place a large container beneath the valve to catch the old coolant. Slowly open the valve and let the coolant flow out. If your tank doesn't have a drain valve, you can use the siphon or pump to remove the coolant. This might take a bit longer, but it gets the job done.
Be careful when handling the old coolant. It's considered hazardous waste and needs to be disposed of properly. Check your local regulations for the correct way to dispose of used coolant. You can't just pour it down the drain!
Removing Debris
After the coolant is drained, you'll see a lot of debris at the bottom of the tank. This can include metal chips, dirt, and sludge. Use a scoop or a small shovel to remove the larger pieces of debris. Be gentle when doing this to avoid scratching the inside of the tank.
For the smaller particles and sludge that are stuck to the walls and bottom of the tank, you'll need to use the scrub brush. Apply some of the cleaning agent to the brush and start scrubbing. Focus on the areas where debris seems to be most concentrated. You might need to put a bit of elbow grease into it, but it's worth it for a clean tank.
Cleaning the Tank Interior
Once you've removed the bulk of the debris, it's time to give the tank a thorough cleaning. Fill the tank with clean water and add some more of the cleaning agent. Use the scrub brush to scrub the entire interior of the tank, including the walls, the bottom, and any baffles or partitions inside. Pay special attention to the corners and crevices where dirt can accumulate.
After scrubbing, let the cleaning solution sit in the tank for a while. This gives the cleaning agent time to break down any remaining contaminants. Then, drain the cleaning solution from the tank. You might need to repeat this process a few times until the water that comes out is clear.
Inspecting the Tank
Once the tank is clean, it's a good idea to inspect it for any signs of damage. Look for cracks, leaks, or corrosion. If you find any issues, it's important to address them right away. Small cracks can be repaired with a suitable sealant, but if the damage is severe, you might need to replace the tank.
Also, check the coolant level sensors and other components inside the tank. Make sure they're clean and functioning properly. If they're dirty, you can clean them with a soft cloth and some cleaning agent.
Refilling the Coolant
After the tank is clean and inspected, it's time to refill it with fresh coolant. Follow the manufacturer's instructions for the correct coolant type and the proper mixing ratio. Usually, you'll need to mix the coolant concentrate with water in a specific proportion. Use a measuring container to ensure you get the ratio right.
Slowly pour the mixed coolant into the tank. Keep an eye on the coolant level to make sure it doesn't overfill. Once the tank is filled to the appropriate level, close the fill cap.
Post - cleaning Checks
Once you've refilled the coolant, start up the lathe and run it for a short period. Check for any leaks around the coolant tank or the hoses. Make sure the coolant is circulating properly. You can also check the coolant level again after the lathe has been running for a while to make sure it's staying at the correct level.
Regular Maintenance Schedule
To keep your coolant tank in good condition, it's important to establish a regular maintenance schedule. Depending on how often you use your Hard Rail Vertical Lathe, you might need to clean the coolant tank every few months. If you use the lathe heavily, you might need to clean it more frequently.
Regularly monitoring the coolant quality is also a good idea. You can use test strips to check the pH level and the concentration of the coolant. If the coolant quality starts to decline, it might be a sign that it's time for a cleaning.
Conclusion
Cleaning the coolant tank of a Hard Rail Vertical Lathe is a relatively straightforward process, but it's very important for the overall performance and longevity of your machine. By following these steps and establishing a regular maintenance schedule, you can ensure that your lathe runs smoothly and efficiently.
If you're in the market for a new Hard Rail Vertical Lathe, or if you have any questions about the maintenance of your existing machine, don't hesitate to reach out. We're here to help you make the most of your machining operations. You can check out our Large Cutting Vertical Lathe, Hard Rail Vertical Lathe, and Heavy Vertical Lathe on our website. Contact us for more information and to start a procurement discussion. We look forward to working with you!
References
- Manufacturer's manual for Hard Rail Vertical Lathes
- Industry best practices for coolant tank maintenance