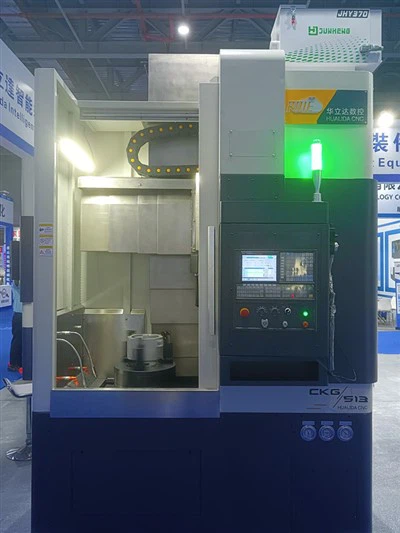
Transferring CAD designs to a CNC turning and milling machine is a crucial process in modern manufacturing. As a supplier of CNC Lathe and Milling Machine, I have witnessed firsthand the importance of a seamless transfer to ensure high - quality production. In this blog, I will guide you through the step - by - step process of transferring CAD designs to a CNC turning and milling machine.
Understanding the Basics
Before delving into the transfer process, it's essential to understand the roles of CAD (Computer - Aided Design) and CNC (Computer Numerical Control) in manufacturing. CAD software is used to create detailed 2D or 3D models of the parts to be produced. These models contain all the geometric information such as dimensions, shapes, and tolerances. On the other hand, CNC turning and milling machines are automated tools that use pre - programmed instructions to remove material from a workpiece to create the desired part.
Step 1: Create a High - Quality CAD Design
The first and most crucial step is to create a well - defined CAD design. Use a reliable CAD software that offers a wide range of features for creating accurate and detailed models. Ensure that your design includes all the necessary dimensions, tolerances, and surface finishes. Double - check the design for any errors or inconsistencies, as these can lead to production issues later on.
When creating the CAD design, consider the capabilities of the CNC Turning and Milling Machine Tools that will be used. For example, if the machine has a limited range of motion or cutting tools, design the part accordingly to avoid any complications during the machining process.
Step 2: Select the Appropriate File Format
Once the CAD design is complete, you need to select the appropriate file format for transferring it to the CNC machine. Common file formats used in CNC machining include DXF (Drawing Exchange Format), STEP (Standard for the Exchange of Product data), and IGES (Initial Graphics Exchange Specification).

DXF is a widely used format for 2D CAD designs. It is compatible with most CNC programming software and can be easily imported into the machine's control system. STEP and IGES, on the other hand, are more suitable for 3D CAD models. They preserve the geometric and topological information of the design, allowing for accurate translation into machining instructions.
Step 3: Prepare the CAD Design for CNC Machining
Before transferring the CAD file to the CNC machine, you need to prepare it for machining. This involves generating a toolpath, which is a set of instructions that tells the CNC machine how to move the cutting tool to remove material from the workpiece.
There are two main ways to generate a toolpath: using CAM (Computer - Aided Manufacturing) software or the machine's built - in programming capabilities. CAM software offers more advanced features and flexibility, allowing you to optimize the toolpath for efficiency and quality. It takes into account factors such as cutting speed, feed rate, and tool selection to generate the most effective machining strategy.
If you choose to use the machine's built - in programming capabilities, you will need to manually enter the machining instructions based on the CAD design. This method is more suitable for simple parts or for users with limited CAM experience.
Step 4: Transfer the CAD File to the CNC Machine
Once the toolpath is generated, you can transfer the CAD file to the CNC machine. There are several methods for transferring files, including USB drives, Ethernet connections, and wireless networks.
If you are using a USB drive, simply copy the CAD file (along with the generated toolpath) onto the drive and insert it into the CNC machine's USB port. The machine's control system will then read the file and import the machining instructions.
Ethernet connections offer a faster and more reliable way to transfer files, especially for large CAD models. Connect the CNC machine to your computer using an Ethernet cable and use the machine's network settings to establish a connection. You can then transfer the file directly from your computer to the machine's control system.
Wireless networks are becoming increasingly popular for file transfer in CNC machining. They offer the convenience of being able to transfer files from anywhere within the network range. However, they may be more susceptible to interference and security issues, so it's important to ensure that your network is properly secured.
Step 5: Set Up the CNC Machine
After transferring the CAD file to the CNC machine, you need to set up the machine for machining. This involves installing the appropriate cutting tools, clamping the workpiece securely to the machine's table, and setting the initial machining parameters such as cutting speed, feed rate, and depth of cut.
Refer to the machine's user manual for detailed instructions on how to set up the cutting tools and workpiece. Make sure that the tools are properly aligned and tightened to ensure accurate machining.
Step 6: Verify and Simulate the Machining Process
Before starting the actual machining process, it's important to verify and simulate the machining instructions. Most CNC machines offer a simulation feature that allows you to preview the machining process on the machine's control screen. This helps you to identify any potential issues, such as tool collisions or incorrect machining paths, before they occur.
During the simulation, check the toolpath to ensure that it follows the CAD design accurately. Pay attention to the cutting forces, tool wear, and surface finish. If any issues are detected, make the necessary adjustments to the machining instructions and repeat the simulation until you are satisfied with the results.
Step 7: Start the Machining Process
Once you have verified and simulated the machining process, you can start the actual machining. Press the start button on the CNC machine's control panel, and the machine will begin to execute the machining instructions.
Monitor the machining process closely to ensure that everything is running smoothly. Check the cutting tools for signs of wear or damage, and adjust the machining parameters if necessary. If any issues arise during the machining process, stop the machine immediately and troubleshoot the problem.
Step 8: Inspect the Machined Part
After the machining process is complete, remove the machined part from the CNC machine and inspect it for quality. Use measuring tools such as calipers, micrometers, and coordinate measuring machines (CMMs) to check the dimensions and surface finish of the part against the CAD design.
If the part meets the required specifications, it can be further processed or assembled. If any deviations are found, analyze the cause of the problem and make the necessary adjustments to the CAD design, machining instructions, or machine setup for future production.
Importance of Quality Assurance
Throughout the process of transferring CAD designs to a CNC turning and milling machine, quality assurance is of utmost importance. By following strict quality control measures, you can ensure that the final product meets the highest standards of quality and precision.
Regularly calibrate your CNC Turning and Milling machines to maintain their accuracy. Train your operators on proper machine operation and quality inspection techniques. Keep detailed records of the machining process, including CAD designs, toolpaths, and inspection results, for traceability and continuous improvement.
Conclusion
Transferring CAD designs to a CNC turning and milling machine is a complex but essential process in modern manufacturing. By following the steps outlined in this blog, you can ensure a seamless transfer and produce high - quality parts efficiently.
As a supplier of CNC turning and milling machines, we are committed to providing our customers with the best - in - class machines and support. If you are interested in purchasing a CNC turning and milling machine or have any questions about the CAD - to - CNC transfer process, please feel free to contact us for more information and to start a procurement discussion.
References
- "CNC Machining Handbook" by John Doe
- "CAD/CAM Fundamentals" by Jane Smith
- Manufacturer's manuals for CAD software and CNC machines